How to Use Electronic Analytical Balance?
Electronic analytical balances are indispensable tools in laboratory work, enabling precise measurements critical to various scientific disciplines. Proper usage of these instruments is essential to obtain accurate results and ensure the integrity of your experiments. In this blog, we will provide a step-by-step guide on how to use an electronic analytical balance effectively.
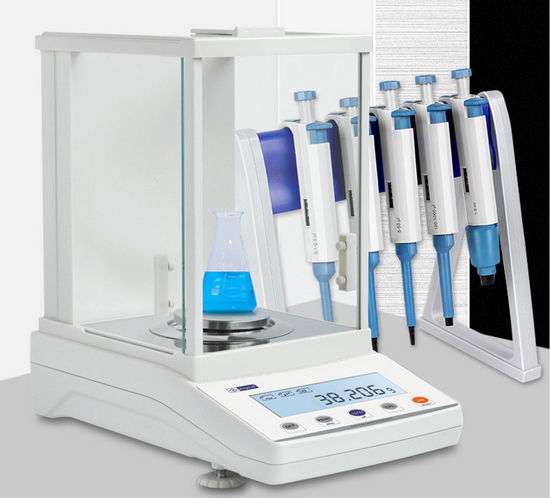
An electronic analytical balance is an electronic balance that integrates precision, stability, multi-function and automation. It can meet the quality analysis requirements of all laboratories. It can also be directly connected to printers, computers and other equipment to expand the use of the balance.
Preparation before use
After unpacking, remove all packaging, take out the buffer sponge at the position of the wind hood, and install the scale pan.
Place the balance on a stable work surface away from vibration, sunlight and drafts.
Working environment temperature: Class I balance is 20℃±2.5℃, and its temperature fluctuation is not more than 1℃/h;
Relative humidity: 50% to 75% for Class I balances; 50% to 80% for Class II balances.
Working voltage: 220V±V, 50Hz.
Observe the level before use. If the blisters are offset, the leveling feet need to be adjusted. Center the bubble in the level.
Steps for usage
Step 1: Preparing the Environment
Before using the electronic analytical balance, ensure that the environment is stable and free from vibrations or air currents. Place the balance on a sturdy, level surface to minimize external influences on the measurements.
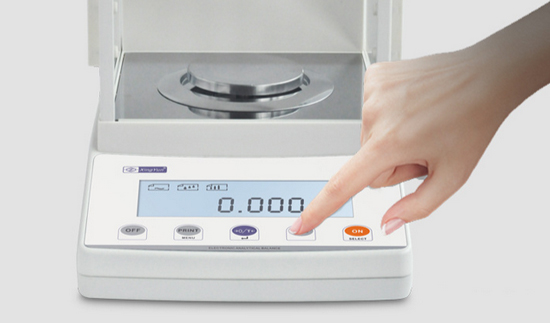
Step 2: Powering On
Start by turning on the electronic analytical balance using the power button. Wait for the instrument to complete its initialization process, which may involve self-calibration. Do not use the balance until it displays "Ready."
Step 3: Taring the Balance
Place an appropriate container or sample pan on the balance's weighing platform. Press the "Tare" or "Zero" button to reset the balance to zero, taking into account the weight of the container. This ensures that only the weight of the sample is measured.
Step 4: Loading the Sample
Carefully place the sample to be weighed onto the container or pan. Avoid touching the sample with your hands to prevent contamination or errors in measurements.
Step 5: Recording the Weight
Once the balance displays a stable reading, record the weight. Make sure to read the value from the digital display when it has settled. If the balance has a draft shield, lower it to protect the sample from air currents.
Step 6: Removing the Sample
Gently remove the sample from the balance. Always handle samples with care to avoid any accidents or spills.
Step 7: Powering Off
After you have completed your measurements, turn off the electronic analytical balance to save power and extend the instrument's lifespan. Be sure to clean the weighing platform and any spilled samples or materials.
Step 8: Maintenance and Calibration
Regularly maintain and calibrate the electronic analytical balance as per the manufacturer's recommendations. Proper maintenance ensures the accuracy and reliability of the instrument over time.
Error testing method
Verification of the maximum allowable error of each load point
The maximum allowable error of an electronic balance refers to the linearity of the balance, which is related to the accuracy level and weighing of the electronic balance. Its purpose is to determine whether the indication error of the electronic balance is within the specified range.
Usually, the indication error (E) is determined by the following formula: E=I-I0, I is the indicated value of the balance, and I0 is the nominal value of the standard weight. For electronic balances, this calculation of indication error is not rigorous enough. We know that the electronic balance is a digital display, and the change of its indication value is not continuous, but in the form of steps. In this way, when the actual indication value of the balance is between two adjacent numbers, the actual indication value is always displayed as an adjacent number according to a certain digital rounding method. Therefore, the digital display value of the electronic balance does not contain the actual value. In addition to the analog indication value, it also contains digital rounding errors. When calibrating the electronic balance, this digital rounding error should be eliminated and the actual analog indication value should be found to accurately determine the indication error of the electronic balance. In actual verification, a method of adding small weights to find digital conversion points is often used to round up the calculation. The process is: for a certain
The calibration point is loaded with the corresponding standard weight L. At this time, the balance displays the value I. Then when the additional small weight Z with the e/10 value is increased one by one to ΔL, the displayed number increases by one word or between two adjacent indications. Switching between jumps. At this time, it can be known that the digital rounding error is (e/2-ΔL), and the actual analog value is (I+e/2-ΔL); thus, the indication error of the calibration point E=(I+e/2- ΔL)-L
Unbalanced load inspection
The eccentric load test, also known as the four-corner error test, tests the ability of the balance to provide consistent results by placing the load at different positions on the scale.
Repeatability test
Repeatability describes the difference between the results of multiple weighings of the same load by an electronic balance under the same measurement conditions. It is a measure of the ability of the electronic balance to achieve consistent weighing results. Repeatability verification should be carried out under no-load and loaded conditions. For electronic balances with e≥5d, it is also allowed to omit the correction process of the digital rounding error and directly use the balance indication value minus the weight mass value to calculate the repeatability error.
Testing of sensitivity and discrimination
Sensitivity refers to the corresponding change in the indicated value of the instrument (ΔL) for a given weight change (Δm). Discrimination is a measure of the scale's ability to respond to tiny loads, that is, how much weight needs to be added to cause a detectable change in the scale's indication. For electronic balances, discrimination is a meaningful concept, while sensitivity has no practical significance. Therefore, the inspector should not misunderstand because the two are listed together in the regulations.
For the verification of the discriminating power of electronic balances in use, a simplified process is usually allowed, that is, a balance is selected that is in a balanced state when no-load or fully loaded, and a small weight with a mass of 1.4d is gently added to the balance. At this time, the original balance indication should change. Generally speaking, there will be no problem with the discriminating power of electronic balances in use, so the regulations point out that electronic balances with d≤1mg or e>2d are allowed to be exempted from testing their discriminating power.
- Before weighing, check whether the balance is normal and in a horizontal position, whether the lifting lugs and ring codes have fallen off, and whether the inside and outside of the glass frame are clean.
- Weighing objects and weights should be taken from the left and right doors. The weighed object cannot exceed the balance load (200 grams), and hot objects cannot be weighed. Corrosive or hygroscopic objects must be weighed in closed containers.
- When turning on the lifting knob (switch knob), be sure to use it gently to avoid damaging the agate knife edge. Every time you add or subtract weights, circle or pick up and place weighing objects, you must first turn off the lifting knob (turn off the balance), and then turn on the knob (turn on the balance) after adding. When reading, be sure to turn the lifting knob switch clockwise to the end to fully open the balance. All weighings in the same chemical test should use the same balance from beginning to end. Using different balances will cause errors.
- Each balance is equipped with fixed weights, and weights from other balances cannot be mistakenly used. Keep the weights clean and dry. The weights can only be picked up with tweezers, never with hands. Put them back into the weight box after use. When turning the circle code to read, the movement should be light and slow to prevent the circle code from falling off.
- After weighing, you should check whether the balance beam is lifted, whether the weight has been returned to its position, whether the index disk has turned to 0, whether the power supply is cut off, and whether the side door is closed properly. Finally, cover the balance and fill in the usage record.
- Always keep the inside of the balance clean. If necessary, wipe it clean with a soft brush or silk cloth or wipe it with absolute ethanol.
- A desiccant should be placed in the balance. Color-changing silica gel is commonly used and should be replaced regularly. Weighing must not exceed the maximum load of the balance.
Using an electronic analytical balance correctly is essential to obtain accurate and reproducible results in laboratory work. By following these steps, you can ensure that your measurements are reliable and that your experiments yield meaningful data. If you would like to learn more about electronic analytical balances, go to ATO.com.
