Mini Portable Gas Detector Functions & Auto Zero Calibration
In today's blog, we're going to provide a comprehensive user guide for the ATO Mini Gas Detector. This portable device is designed for easy gas leak detection, and it boasts a user-friendly interface with simple operational functions. Whether you're new to gas detection or a seasoned pro, you'll find this guide helpful in navigating the key features and functionalities of the Portable Gas Detector.
The ATO Mini Gas Detector is designed with user simplicity in mind. With only two push buttons, you'll quickly become familiar with its operation. Let's dive into the device's features and functions.

Standard Detection Interface
Upon starting the device, you'll be greeted by the standard detection interface. The Y/+ button on the left allows you to check various measurement readings, including high and low alarms, STEL (Short-Term Exposure Limit), TWA (Time-Weighted Average), peak value, minimum value, and a return to the detection mode. To clear the peak value record, simply press the power button.
Alarm Modes
To ensure the proper functionality of alarm modes, you can initiate a self-test by pressing the power button. The device will activate its LED alarm light, vibrator, and audible siren simultaneously to indicate whether they are functioning correctly.
Exploring More Features
If you're eager to explore additional features, press and hold the Y button to enter a password for verification. The initial password is "1234." Use the Y button to navigate through the 4-digit password and the left arrow button to change digits. Confirm your selection by pressing the power button, and it will display "OK" and guide you to zero calibration.
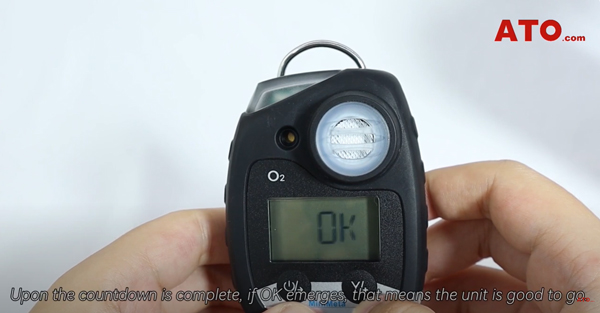
Zero Calibration
The first function allows you to perform an auto zero calibration on the oxygen sensor. By pressing the Y button, the device will prompt you when calibration is due. To ensure the success of this test, it's important to prepare the unit by placing it in standard calibration gas or clean air for 3 to 5 minutes before the test begins. If "OK" appears upon countdown completion, it signifies the unit is calibrated. You can stop the calibration process by pressing the on/off button or return to the detection interface by long-pressing the Y button.
Span Calibration
Following zero calibration, the span calibration is required to be carried out by qualified professionals. This calibration ensures the accuracy of the instrument when detecting potential gas leaks. Regular calibration is essential for reliable operation.
Reset Function
The reset function erases all data and settings, restoring the device to its original status. To activate this function, press the Y button and follow the 20-second countdown. After the reset, the screen displays "OK," indicating successful completion. You can choose to abort the operation by pressing the on/off button during the countdown or return to the detection interface by long-pressing the Y button.
Exiting the Setting Interface
The final menu option allows you to exit the setting interface with a simple press of the Y button, returning to the measurement mode.
The ATO Mini Portable Gas Detector is a valuable tool for gas leak detection, and it's characterized by its ease of operation and information accessibility. It's budget-friendly and doesn't require extensive technical knowledge to operate. With this user guide, you can confidently use this device to identify potential gas leaks, ensuring safety in various environments.
The above is an introduction to the functions and features of the Mini gas detector. More gas detectors are in the ATO store. If you want to know the detailed operation process, please watch the video below.
