How to Install Electric Valve Actuator?
The electric actuator is an important execution unit of the combined instrument of the electric unit. It consists of two completely independent components, the control circuit and the actuator, which can receive the electric control signal from the regulator and convert it linearly into a mechanical angle or linear displacement. It can be also used to control the adjustment of the damper, baffle, valve, and other mechanism for automatic control.
In recent years, with the rapid development of electronic technology and control technology, electric actuators have also achieved rapid development. Because of the powerful functions of electric actuators, they are widely used in industrial production and are purchased and installed by more and more people. So what should we pay attention to when installing? Next, let's take a look together.
Check steps before installation:
Check whether the basic parameters listed on the nameplate of the small electric actuator meet the actual use conditions. The installation of the equipment can only be done when the power is turned off, otherwise it will cause electric shock or product damage. Turn the electric butterfly valve manually to make sure there is no abnormality, and make the valve in the fully closed position. Fix the bracket on the valve, and put one end of the coupling on the valve mandrel. The electric actuator is turned to the fully closed position, and the output shaft is inserted into the square hole of the coupling.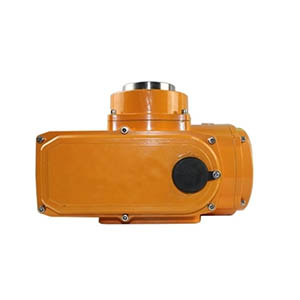
Parts that rotate or move during the operation of the actuator shall be identified. Before running new equipment, repairing or restarting equipment, we should pay attention to the following points:
Check the model number of the electric actuator. The specifications should meet the design requirements, the installation location should be indicated, and records should be made. Check the insulation resistance value of the electrical part of the electric valve actuator, it should be greater than 1 megohm.
After installing the actuator housing, rotate the wheel to drive the actuator to the middle position of the stroke, and add a short pulse signal to make the actuator move in two directions, up and down. Then check the action direction of the actuator. If it is inconsistent, it is necessary to exchange the valve stem retraction action with the valve stem extension action.
Run the actuator up and down to the end position, then check whether it can be closed automatically, and whether all external moving parts can move freely. If it does not move correctly, check the surrounding installation for correctness. You should correct it if necessary, and put the unit back into operation.
The valve installation structure of the existing electric actuator is generally installed and fixed by multiple screws. But in the actual use process, there is fluid flow inside the valve, so it will produce a certain range of long-term vibration, which lead to, after a long time of use, the screws are prone to loosening to a certain extent due to vibration, thereby affecting the stability of the installation combination and further affecting the long-term use effect of the entire device.
So we should tighten the screws between the actuator mechanism and the bracket and turn the device by the handle to verify that the movement is smooth and there is no off-center tilt. Since the wiring, adjustment, inspection and maintenance of the valve actuator need to remove the shield, there should be a certain space on the top of the actuator during installation.
Installation steps
The installation posture of the electric actuator should be installed vertically upward as far as possible, and the downward inversion should be avoided, because the motor contained in the electric head cannot be downward, which is convenient for wiring, debugging and manual operation. And it is not allowed to apply different power sources when turning on and off at the same time. After the electric actuator is connected with the regulating valve through the bracket, when connecting the output shaft and the valve stem with a split nut, there should be a distance of 3-10mm between the lower end of the output shaft and the upper end of the valve stem.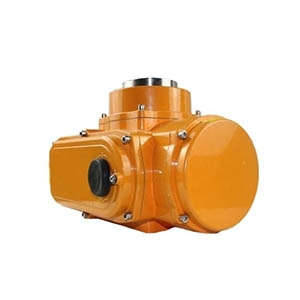
In order to prevent water from entering the external wiring, construction in rainy days should be avoided, and the protective cover should be fastened after wiring, adjustment, inspection and maintenance. The reduction box of the electric actuator should be filled with grease according to the manufacturer's regulations, and the electric actuator must not have oil leakage. The direction of the arrow on the valve should be consistent with the direction of the medium flow. The electric actuator should have obvious opening and closing direction signs. At the same time, the operating direction of the hand wheel should follow, clockwise is "closed", and counterclockwise is "opened". .
Electric actuators provide stimulation to secondary devices via electric motors. The output of an electric actuator is of two types: linear actuator and rotary actuator. Wherein the rotary actuator can produce more than one full rotation. Most linear electric actuators utilize gearing to lengthen and shorten the actuator arm. Rotary types also employ direct connections to transmit motion, gears, and cams, depending on application torque requirements.
The electric actuator is that the axial clearance of the valve connection is not less than 1-2 mm. Before the intelligent electric actuator is energized, visual and insulation inspections must be carried out, whether the power circuit and the signal contact are insulated from the shell, and then the signal is input. After energizing, check the transformer, electrical and electronic components and other parts of the circuit for overheating. When an abnormal phenomenon is noticed, the power supply should be cut off immediately and the cause should be determined. Do not disassemble components easily until the cause is determined. When replacing electronic components, avoid overheating so as not to damage to the components.
When replacing effect tubes and integrated circuits, they must touch the ground, or use the residual heat of the welding power source for welding. Marking is essential when removing parts or wire, in the case of mixing of different parts. Avoid disconnection of the output circuit and power failure of the device under test during signal input.
The electric actuator needs to maintain flexible operation, no looseness and jamming, and can be fully closed and opened normally. There should be no jumping or jittering on the valve opening indicator, the insulation resistance of the actuator should be within a reasonable range. And the actuator rotates smoothly and the sound of the actuator motor should be normal. There should be obvious and correct opening and closing marks on the valves and dampers, as well as direction indications, angles and directions, which meet the requirements of the electric actuators used.
Precautions of installation
In the continuous production of modern technology, electric actuators are affected by factors such as temperature, pressure, vibration, etc. And problems such as leakage and leakage occur. The traditional maintenance methods are punching tools or welding repairs, but they have great limitations. Moreover, some leakages are limited by the safety requirements of the working environment and cannot be solved on-site. Therefore, the material selected for the electric head should have excellent anti-corrosion performance, and is suitable for on-site treatment of equipment pipelines in the electric power and chemical industries.
The cable conduit of the electric valve actuator should be run from the bottom to the top from the position lower than the actuator. If the site conditions are not met and the cable conduit needs to be run from the top to the bottom, the cable conduit should be led 50cm below the actuator to prevent water enters the actuator's position transmitter connector from the cable conduit.
The installation of the electric actuator should be firm and stable. The actuator should not shake when it is fully open or fully closed. The center of the hand wheel of the electric actuator is at least 850mm from the ground, which is convenient for maintenance and repair personnel to operate.
