How to Calibrate with CHB Load Cell Controllers?
A load cell is a device used to measure the mass or weight of an object by converting the effect of gravity on the object into an electrical signal or digital data. These load cells are typically used in a wide variety of applications, including industrial, commercial, and scientific research. ATO online store will show you how to calibrate it using the load cell in question.
Load cells work based on Hooke's Law or other physical principles. They consist of one or more sensing elements that are subjected to small deformations or displacements caused by the force of gravity applied to an object. Sensors measure this displacement and convert it into electrical signals. These electrical signals are usually amplified and processed and then output the weight or mass of the object.
How to Connect a Load Cell?
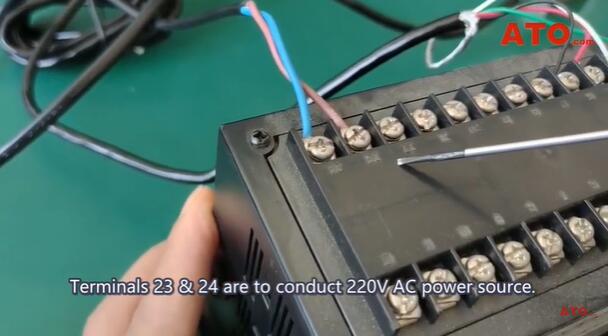
First, look at the wiring which is generally labeled on the top. The input (No.13 &14) and excitation supply (No.15 &16) terminals are located on the top of the load cell. The input is to be connected to the signal wires of the load cell with green wire to the positive and white to the negative, while excitation terminals, as the name suggests, connecting up to the excitation wires of the cell with red lead to the positive and black lead to the negative. Terminals 23 & 24 are to conduct 220V AC power source. The load cell is rated at 10kg in capacity which is equivalent to 10000g.
How to Set Up the Load Cell?
- First off, press the first button to the left to enter the settings.
- Push the first button quickly to switch between different parameters and locate Option oA.
- Select it by pushing the second button, aka the button with a left arrow. Enter the password which is 4 ones.
- Push the up arrow to turn 0 into 1 and push the left arrow to alter the digit.
- Press the dot button quickly and that’s save the setting.
- Then press that button again and quickly push it twice and find the parameter F minus, and press the second button to enter the setting.
The current capacity rating displays 8,000g. However, ATO load cell is rated at 10,000g. Therefore, adjust it accordingly. Of course, this load cell indicator can also accommodate other capacity ratings. Other adjustments can be made as required. Keep in mind when you’re done you hit that dot button to save the setting.
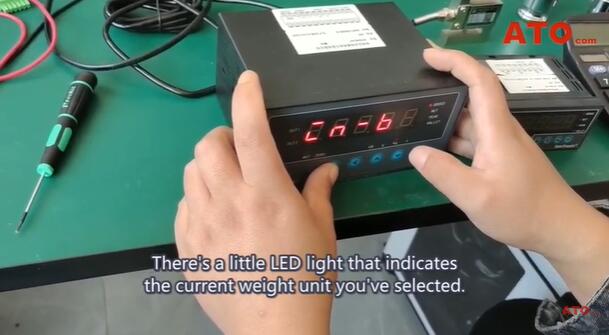
A little LED light that indicates the current weight unit you’ve selected. It shows kg right now and change it into g. The little LED indicates the current weight unit is kg. Push the first button real quick to switch over to Option un which means unit and push the second button to go into the setting. Find Option un and different codes represent different units in it. 00000 represents ton, 00001 means kg, and 00002 refers to g. Change the last digit into 2. Save it by pressing the first button. Then long press the first button to exit.
How to Verify the Load Cell?
Now it’s time to verify.
- Load the load cell with a 500g weight placed on the gauge area. The display reads 378. That is inaccurate. That means we need to determine the appropriate compensation factor for the specific load cell. Divide the rated capacity 500g by the result 378 to get the compensation factor.
- Long press the first button, go into the setting, and select Option oA where we’ve just entered the password. Long press the first button once again to locate Option F2 for the compensation factor.
- The option code is F2. Select it by pressing the second button. It shows 0.9587 for now. Need to multiply it by the calculated result 1.3227 and got 1.2681. That’s the exact value to enter into the factor setting. By the way, you could reduce the number by pressing the last button, the down button.
Save the modification and long-press the first button to exit. See that the indicator gives the correct reading of the 500g weight. Do further verification. Long press the last button to return to zero. Place a 100g weight on the load cell, and the measured result is 100g. Clear and correct. That's the end of calibration.
This is how calibration is done using a CHB load cell controller. If you would like more details on load cell testing, click on the video below:
