How is Auto Heating Control Wired Using a PID Temperature Controller?
Accurate and stable temperature control is essential in industrial heating systems, laboratory equipment, and automation applications. PID temperature controllers are widely used due to their precision, reliability, and ability to maintain stable temperatures automatically. In this article, we demonstrate how to build an automatic heating control system using a PID temperature controller, focusing on wiring logic, terminal functions, and system operation. The example shown is a three-phase heating control circuit with built-in safety and alarm functions.
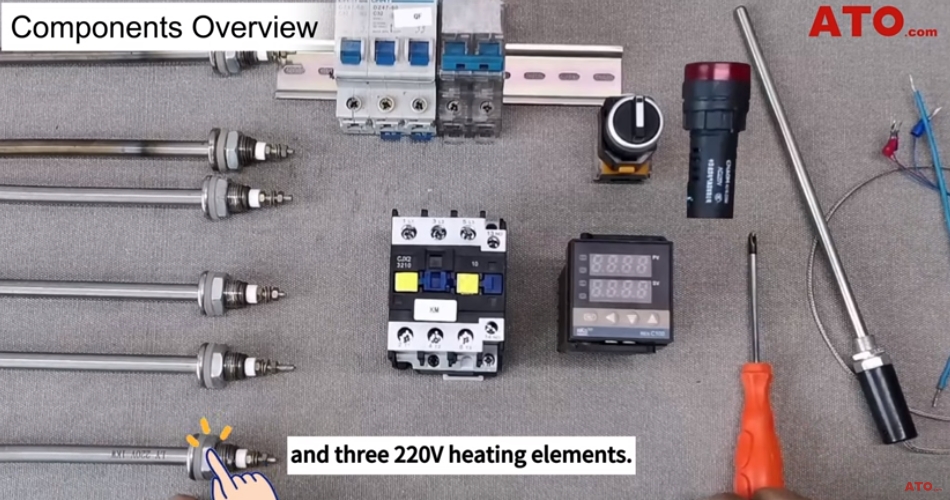
I. Required Components
- PID temperature controller
- RTD Pt100 temperature sensor
- 3-phase power supply
- Power and heating circuit breakers
- AC contactor
- Selector switch (Auto/Manual)
- Overheat Alarm
- 220V heating tubes (×3)
II. PID Controller Terminal Functions
- Terminals 1 & 2: 220V AC power supply (non-polarized)
- Terminal 3: Common contact (COM)
- Terminal 4: Normally open contact (NO)
- Terminal 5: Normally closed contact (NC)
- Terminals 6 & 7: Over-temperature alarm output
- Terminals 8, 9 & 10: Temperature sensor input
The PID temperature controller serves as the core control unit, handling temperature measurement, logic processing, and output control.
III. Control Circuit Wiring
1. Power Supply Connections
From the power output, connect two neutral wires: one to the A1 terminal of the contactor coil, and the other to terminal 1 of the temperature controller.
Route a live wire from the power output through the normally open contact of the selector switch to terminal 2 of the controller. Then jumper terminal 2 to terminal 3, and connect terminal 3 to terminal 7 for the alarm circuit.
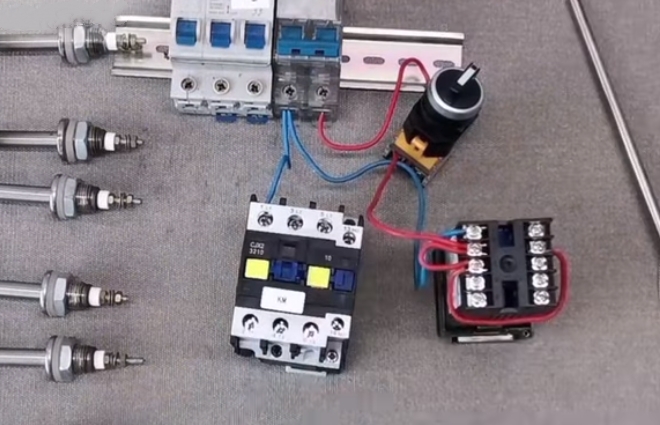
2. Alarm Circuit
Connect the positive terminal of the 220V alarm to terminal 6, and the negative terminal to terminal 1 of the controller. This enables an alert when an over-temperature condition occurs.
3. Temperature Sensor Wiring
For an RTD sensor:
- Red wire → terminal 8
- Two blue wires → terminals 9 and 10 (order does not matter)
IV. Contactor Control and Main Circuit Wiring
Connect terminal 4 (normally open contact) of the temperature controller to the A2 terminal of the contactor coil. When the controller outputs a heating signal, the contactor energizes.
For the main power circuit, connect the three-phase supply lines to the contactor input terminals L1, L2, and L3.
V. Heating Element Configuration
Since all three heaters are rated at 220V, they should be wired in a star (Y) configuration:
- Each phase connects to one heating element
- The remaining ends of the heaters are joined together to form the star point
- Neutral connection is optional, depending on system requirements
This configuration helps balance the load across phases and is commonly used in three-phase heating systems.
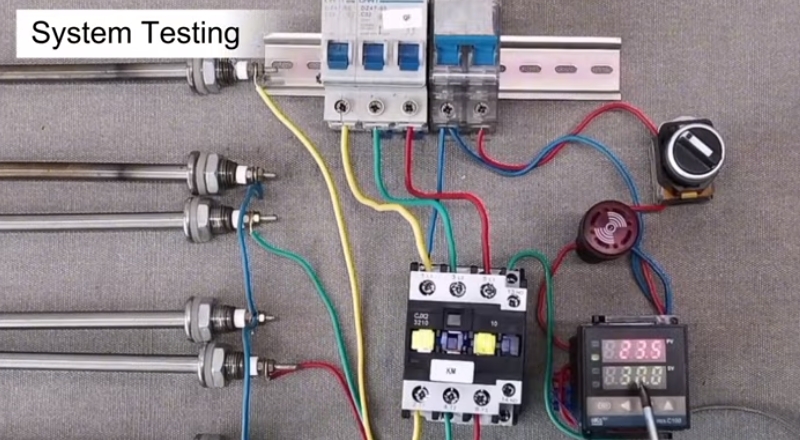
VI. System Testing and Operation
For safety reasons, the main heating circuit breaker is not closed during initial testing. Instead, only the control circuit breaker is switched on.
Once the selector switch is turned on:
- The temperature controller powers up
- If the measured temperature is below the setpoint, the controller activates the contactor, and heating begins
- When the temperature reaches the set value, the contactor disconnects, stopping the heaters
- As temperature drops, the system automatically resumes heating
The target temperature can be easily adjusted using the controller’s front panel keys.
VII. Conclusion
Proper wiring and understanding of control logic are key to building a stable and efficient heating control system. This guide demonstrates a complete PID-based automatic heating control wiring method, suitable for industrial heating, experimental setups, and educational applications. By integrating a contactor and alarm circuit, the system achieves precise temperature control while maintaining a high level of operational safety.
Click to watch our detailed video tutorial for a step-by-step demonstration of the wiring process. And visit ATO one-stop online store to explore the same high-quality components featured in this article — from precision temperature controllers and durable contactors to efficient heating elements. We provide everything you need to bring your professional temperature control solutions to life. Happy building, and feel free to reach out if you have any questions along the way!
