How to Maintain and Calibrate Weighing Indicator?
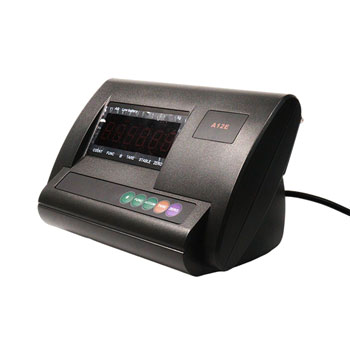
A weighing indicator is the central control unit of any weighing system. It receives the low-voltage signals generated by the load cell, amplifies and processes them, and converts them into clear, stable weight readings on the display. Whether used in a laboratory balance, an industrial platform scale, or a weighbridge system, the weighing scale indicator’s accuracy directly affects the reliability of every measurement.
To achieve consistent, traceable, and compliant weighing results, a weighing indicator must be both properly maintained and periodically calibrated. Regular maintenance helps prevent hardware damage, environmental interference, and data drift, while calibration ensures the readings stay aligned with national or international measurement standards. This comprehensive guide explains how to maintain and calibrate a weighing indicator for optimal performance and long-term reliability.
Contents:
- How to Maintain a Weighing Indicator?
- How to Calibrate a Weighing Indicator?
- Recommended Calibration Frequency
- Conclusion
How to Maintain a Weighing Indicator?
1. Keep the Weighing Indicator Clean and Dry
Environmental contaminants are one of the most common causes of inaccurate readings. Dust and moisture can enter the housing and interfere with the signal circuits.
- Clean the weight scale indicator surface regularly using a soft, lint-free cloth.
- Avoid direct water contact or high-pressure cleaning.
- Use a mild neutral detergent if needed; never use solvents like alcohol or benzene.
- In high-humidity or dusty environments, install the indicator in a sealed control box or use an IP65–IP68-rated enclosure.
Tip: Always disconnect power before cleaning to prevent short circuits or static discharge.
2. Inspect Cables and Connectors Regularly
Cables serve as the lifeline between the load cell and the weighing indicator. Loose or damaged connections may cause unstable readings or calibration drift.
- Check all connectors for corrosion, loose screws, or frayed wires.
- Keep signal cables away from power lines, frequency inverters, and motors that produce electromagnetic interference (EMI).
- Use shielded cables and ensure proper grounding at one end only.
- Replace any damaged cables immediately rather than attempting to repair them.
Tip: Poor cable shielding is a leading cause of random weight fluctuations in digital weighing systems.
3. Monitor Zero Stability and Drift
Before every operation, ensure the weighing indicator reads zero when unloaded. If the zero point drifts after warm-up, check for:
- Unstable power supply or grounding problems.
- Vibrations or mechanical stress on the load cell.
- Temperature variation or humidity affecting sensor resistance.
Tip: If the drift persists, perform a quick recalibration or inspect the load cell and signal cable integrity.
4. Avoid Overload, Shock, and Static
Physical abuse is one of the fastest ways to damage an weighing scale indicator.
- Never exceed the maximum rated capacity of the scale.
- Prevent sudden impacts such as dropping heavy objects onto the platform.
- For mobile or crane scales, install overload limiters or shock absorbers.
- Use anti-static grounding if operating in dry environments or with powder materials.
Tip: Even one severe overload can permanently change the load cell’s characteristics, making calibration impossible.
5. Maintain a Stable Working Environment
Temperature, vibration, and electrical noise can all cause measurement instability.
- Install the weighing indicator on a solid, vibration-free surface.
- Avoid locations near strong magnetic fields, motors, or welding equipment.
- Use an uninterruptible power supply (UPS) or voltage regulator to stabilize power.
- Keep operating temperatures within the manufacturer’s recommended range.
6. Update Firmware and Record Maintenance Logs
Modern digital weight indicators often include firmware that improves signal filtering, temperature compensation, and calibration algorithms.
- Check for firmware updates at least once a year.
- Record all maintenance and calibration dates, including test results and reference weights used.
- Keeping detailed logs helps ensure traceability for ISO, GMP, or OIML compliance audits.
How to Calibrate a Weighing Indicator?
Calibration aligns the weighing indicator’s electrical signal with actual physical weight. Even the most advanced weight indicator requires periodic calibration to correct drift caused by component aging or environmental change. The process is similar across most weighing indicators.
1. Enter Calibration Mode
Access the calibration menu according to model’s instructions.
- Press a specific key combination (e.g., FUNC + ZERO, or holding CAL for 3 seconds).
- Ensure the weighing indicator is stable and all connected load cells are functioning correctly.
- Select the proper mode If weight indicator supports multi-point or linear calibration.
Tip: Record the original calibration data before making changes, so you can restore it if needed.
2. Zero Calibration
This step removes mechanical bias and compensates for small offsets in the load cell output.
- Ensure the weighing platform is completely empty.
- Press the ZERO or ENTER key to set the no-load condition as zero.
- Wait until the display stabilizes and confirms the zero point.
3. Span (Load) Calibration
- Place a certified standard weight—ideally 50% to 100% of the scale’s rated capacity—on the platform.
- Enter the exact weight value using the keypad or adjustment knob.
- Allow the weighing indicator to process and calculate the internal scale factor.
- The display should now show the test weight precisely.
Tip: If weighing scale indicator allows multi-point calibration, repeat the process using different known weights to enhance accuracy across the full range.
4. Verification and Fine-Tuning
- Remove the weight and confirm that the display returns to zero.
- Test with smaller and larger weights to verify linearity.
- If errors exceed the allowable tolerance, repeat the span calibration or check for mechanical issues.
- Once verified, save the calibration settings to memory.
Tip: Many digital weighing indicators store calibration data in non-volatile memory, so settings remain even after power loss.
Recommended Calibration Frequency
The ideal calibration frequency depends on your application and environment:
| Application Type | Recommended Interval |
| Laboratory or analytical balance | Every 3–6 months |
| Industrial platform or floor scale | Every 6–12 months |
| Weighbridge or truck scale | Every 12 months or per regulation |
| Harsh environment (humidity, vibration, temperature changes) | Every 3 months |
Always follow local metrological standards (such as OIML, ASTM, or NIST) and company’s quality control policy.
Conclusion
Proper maintenance and calibration are essential for any weighing system to function with precision and reliability. Regular inspections, clean operating environments, and certified calibration procedures not only extend the lifespan of your weighing indicator but also prevent costly downtime and measurement errors while ensuring compliance with quality and safety standards.
A well-maintained and accurately calibrated weighing indicator guarantees consistent, trustworthy results every time, whether used in laboratory testing, industrial production, or commercial weighing applications. For more information on the proper maintenance and calibration methods for specific models of weighing indicators, please consult the professional technical staff on the ATO.com.
