
How to Calibrate Conductivity Sensor?
The calibration of conductivity sensor is the key operation to ensure the measurement accuracy. Its core is to correct the measurement deviation of the sensor through the standard solution of known conductivity. The following are common calibration steps, which are suitable for laboratory and industrial online sensors.
Quick Answer:
To calibrate a conductivity sensor: clean the electrode, immerse it in a standard solution of known conductivity, let the reading stabilize, then confirm the value so the instrument can calculate a correction factor. Two-point (or multi-point) calibration is recommended for most applications because it corrects the full measurement curve, not just one value; single-point calibration is only accurate enough for quick routine checks between full calibrations. The complete procedure is below.
- Tools Required for Calibration
- Step-by-Step Calibration Procedure
- Calibration Frequency and Maintenance Schedule
- Common Conductivity Sensor Calibration Problems
- Conductivity Sensor Troubleshooting FAQ
- Conductivity Sensor Maintenance and Replacement
- Summary
Tools Required for Calibration
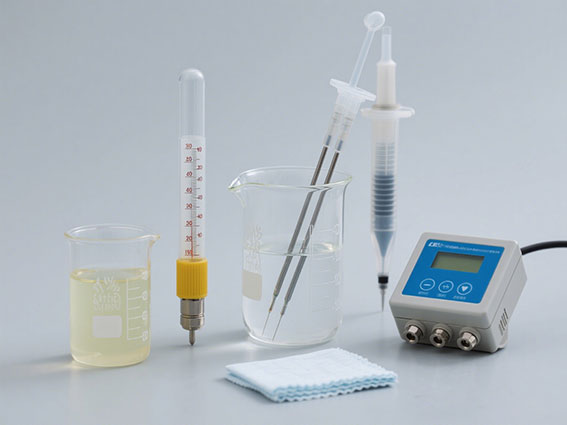
Standard solution: Select at least 2 concentrations of standard solutions according to the measurement range of the conductivity sensor. Common reference points include 84 μS/cm and 1413 μS/cm for low-to-general conductivity ranges, and 12.88 mS/cm or 111.8 mS/cm for higher-conductivity applications — choose the pair that brackets your sensor's typical operating range.
Container: Clean glass or plastic beaker.
Auxiliary tools: Thermometer (used when calibrating temperature compensation), pipette (pipetting standard solution), distilled water or deionized water (cleaning electrodes), dust-free cloth or filter paper (absorb the moisture on the electrode surface, and do not wipe the sensing surface of the electrode).
Equipment: Conductivity sensor host (connected controller/ transmitter) to ensure that the power supply is stable and the calibration mode can be started normally.
Step-by-Step Calibration Procedure
The following steps explain how to calibrate a conductivity sensor using a standard solution.
1. Clean and equilibrate the electrode
Rinse the electrode surface with distilled water 3 to 5 times to remove residual pollutants. If there are stubborn stains, you can lightly brush with a soft-bristle brush or (10%) soak for 5 minutes and then rinse (to avoid scratching the electrode coating). Pour the standard solution into the beaker, place it in room temperature environment with the sensor for 10 ~ 15 minutes, ensure that the temperature of the standard solution is consistent with that of the sensor (reduce the temperature compensation error), and record the current temperature of the standard solution (or use the temperature probe that comes with the conductivity sensor).
2. Enter calibration mode
Turn on the conductivity sensor host or connected controller, and enter the "Calibration Menu" according to the instructions (usually select the "Calibration" option through the button or software interface). Select single-point or multi-point calibration — see the Quick Answer above for which to choose.
3. Set the calibration parameters
Enter the conductivity value of the standard solution (Note: the standard solution label usually marks the theoretical value at 25 °C. If the actual temperature deviates from 25 °C, it needs to be corrected according to the temperature coefficient of the standard solution, some smart conductivity sensors can automatically correct). Select the number of calibration points.
4. Calibrate the first point
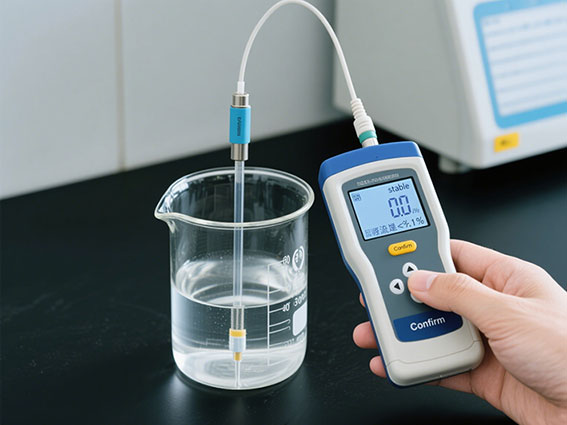
Immerse the cleaned electrode in the standard solution, ensure that the electrode sensing surface (usually the electrode sheet or annular area) is flooded, and avoid touching the wall or bottom of the beaker. Wait for the reading to stabilize (usually 30 ~ 60 seconds, the screen shows "stable" or the value fluctuates < ± 1%). Press the "Confirm" key, the instrument will record the deviation between the conductivity sensor measurement value and the theoretical value of the standard solution, and automatically calculate the correction coefficient.
5. Calibrate the second point
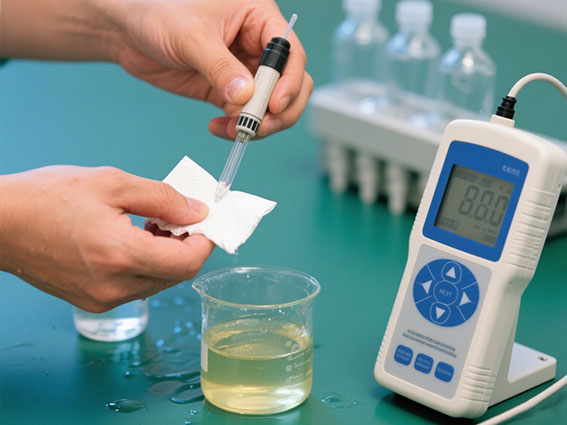
Take out the electrode, rinse it 3 times with distilled water, and absorb the surface water with filter paper (to avoid contaminating the high-concentration solution with the residual low-concentration standard solution). Repeat the above steps: immerse in the second standard solution, wait for stability and confirm. The instrument will optimize the linear correction curve based on the two-point data to reduce the full-scale error.
6. Verify the calibration
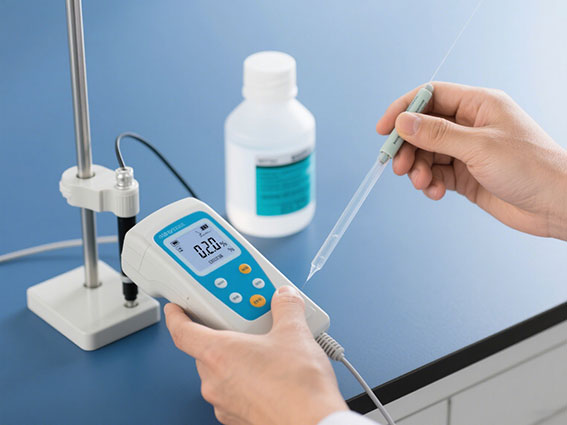
After the calibration is completed, the standard solution can be measured again to check whether the deviation between the displayed value and the theoretical value is within the allowable range (usually within ± 2%). If the deviation is too large, it is necessary to re-clean the electrode and repeat the calibration to eliminate operation errors.
7. Save and record calibration data
Confirm that calibration parameters have been saved to the conductivity sensor or host. Record the calibration date, standard solution information, and deviation value before and after calibration as a reference for the next calibration (it is recommended to attach it to the equipment maintenance log).
8. Clean the sensor and tools
Rinse the electrode with distilled water. If it is not used for a long time, it must be stored according to the instructions (for example, the metal electrode can be soaked in 3mol/L KCl solution to avoid drying and aging of the electrode). If the standard solution is not contaminated, it can be sealed and stored in refrigeration (short-term use). If it is contaminated or expired, it should be discarded (to avoid affecting the next calibration).
Calibration Frequency and Maintenance Schedule
Calibration frequency depends on the sensor type and the application, not a fixed schedule.
| Application | Typical Calibration Frequency | Why |
| General process monitoring | Monthly | Routine calibration helps maintain measurement accuracy during normal operation |
| Critical or high-purity processes | Weekly to monthly | More frequent calibration helps meet strict accuracy and quality requirements |
| Wastewater or chemical processing (contacting or 4-electrode sensors) | Weekly (prone to fouling) | Frequent checks help compensate for contamination and electrode condition changes |
| Wastewater or chemical processing (inductive / toroidal sensors) | Monthly (better fouling resistance) | Inductive sensors typically require less frequent calibration due to reduced fouling effects |
Regardless of schedule, recalibrate immediately after cleaning the electrode, after replacing the standard solution, or whenever a reading drifts or becomes unstable.
Common Conductivity Sensor Calibration Problems
The table below lists common conductivity sensor calibration problems, causes, and solutions.
| Symptom | Possible Cause | Solution |
| Reading too high or inaccurate | Electrode fouling, expired calibration solution, incorrect temperature compensation, mismatched cell constant (K), or improper inductive sensor installation | Clean the electrode, replace the calibration solution, check temperature compensation settings, verify the cell constant, and correct sensor installation |
| No reading or signal output | Loose wiring, unstable power supply, damaged signal cable, failed temperature sensor, or incorrect sensor installation | Check power supply, wiring connections, sensor installation, and controller settings before recalibration |
| Calibration fails | Contaminated electrode, expired or incorrectly prepared standard solution, or damaged sensing element | Clean the electrode, use fresh calibration solution, and inspect the sensor for physical damage |
| Reading does not stabilize during calibration | Insufficient temperature stabilization, trapped air bubbles, or incorrect sensor mounting | Allow temperature equilibration, remove air bubbles, and adjust installation according to sensor guidelines |
After long-term use, the electrode constant K may change due to corrosion or wear. The core of calibration is to correct the K value to ensure the accuracy of the measurement formula (conductivity = K × current/voltage).
Conductivity Sensor Troubleshooting FAQ
Q1: Why is my conductivity sensor reading too high or inaccurate?
Inaccurate or high readings are usually caused by one of five issues: a fouled or coated electrode, an expired or contaminated standard solution, missing or incorrect temperature compensation (readings shift about 2-3% per °C without it), a drifted electrode constant K after long-term use, or a cell constant that doesn't match the medium (a low-K probe used on a high-conductivity liquid, or the reverse). For inductive sensors, a reading can also run high if the probe is mounted too close to a metal pipe wall, which distorts the magnetic field. If cleaning and recalibration don't fix it, check the installation clearance and inspect the electrode for wear.
Q2: Why is my conductivity sensor not working or showing no reading?
No reading at all is usually a wiring or power problem, not a calibration issue. Check for a loose or disconnected electrode cable, an unstable power supply to the controller, a broken signal wire between the sensor and the receiving device, or a failed internal component such as the temperature sensor (often shown as an open-circuit or short-circuit alarm). Also confirm the sensor is actually submerged — an empty or partially filled pipe from incorrect mounting can look identical to a wiring fault. Rule these out before recalibrating.
Q3: Why does conductivity sensor calibration fail or not stabilize?
Failure and instability have different causes. Calibration is typically rejected outright due to electrode contamination, an expired or incorrectly prepared standard solution, or physical electrode damage. A reading that won't stabilize during the 30-60 second wait is usually incomplete temperature equilibration between the electrode and the standard solution, or trapped air bubbles on the sensing surface — a common issue for inductive sensors if the standard solution isn't evenly mixed, or if the sensor wasn't mounted following upward-flow and 45° mounting guidance. Re-equilibrate temperature and re-clean the electrode to resolve most cases.
Conductivity Sensor Maintenance and Replacement
Routine cleaning and storage between calibrations (as described in step 8 above) slow electrode wear, but every sensor eventually reaches the end of its service life. Service life varies by application, electrode material, and how well the sensor is maintained — there is no single fixed lifespan. Replace the sensor when:
- The reading keeps drifting even after cleaning and recalibration
- The electrode constant (K) can no longer be corrected back within the normal accuracy range
- The electrode housing shows cracking or visible aging
- The electrode tips are broken, unevenly worn, or show visible plating (material transferred from one tip to the other)
- The built-in temperature sensor fails, shown as an alarm on the controller
Summary
Regular and standardized calibration is a critical measure to ensure the long-term measurement accuracy of conductivity sensors. By employing multi-point calibration, temperature compensation, and strict cleaning procedures, it effectively corrects electrode constant drift and systematic errors, eliminating measurement deviations caused by sensor aging, contamination, and environmental changes. Post-calibration steps such as verification, documentation, and proper storage are essential to establish a complete quality traceability chain, ultimately providing reliable and continuous data support for laboratory testing and industrial online process control. If the conductivity sensor cannot be calibrated correctly, it is recommended to contact ATO automation store or the relevant technical personnel.
