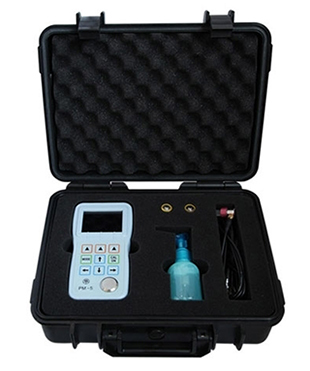
How do You Use Ultrasonic Thickness Gauge?
 1. When testing, it is necessary to pay attention to the metal magnetic properties and surface roughness of the standard plate should be similar to the test piece.
2. When measuring with ultrasonic thickness tester, the probe of the ultrasonic thickness gauge must be perpendicular to the surface of the sample.
3. When measuring, pay attention to the critical thickness of the base metal. If it is greater than the critical thickness, the measurement is not affected by the thickness of the base metal.
4. When measuring, pay attention to the influence of the curvature of the test piece on the measurement. Therefore, it is not reliable to measure on the curved surface of the test piece.
5. Before measuring, you need to pay attention to whether other electrical equipment around will generate magnetic field. Because if a magnetic field is generated, it will interfere with the magnetic thickness measurement method.
6. When measuring, it is important to avoid measuring at inner corners and near the edge of the specimen, because the surface shape of the test piece of the general thickness gauge will suddenly change sensitively.
7. During the measurement, the pressure needs to be kept constant, otherwise it will affect the measured readings.
8. When testing, the probe of the ultrasonic thickness tester should be in direct contact with the test piece. Therefore, the material attached to the side head of the ultrasonic thickness gauge should be removed before measuring.
9. A surface that is too rough will cause errors in the measurement of the ut thickness gauge, and even cause the instrument to have no reading. Before measurement, try to make the surface of the tested material as smooth as possible. It can be kept smooth by grinding, throwing, filing and other methods. Alternatively, a high-viscosity coupling agent can be used, and the coarse-grain probe SZ2.5P can be used.
10. The regular fine grooves caused by rough machined surfaces (such as lathes or planers) can also cause measurement errors. For such errors, please use the same method as 9. In addition, it is necessary to adjust the angle between the probe crosstalk interlayer (the thin layer passing through the center of the probe bottom surface) and the thin groove of the measured material, so that the interlayer and the groove are perpendicular or parallel to each other. Afterwards, you can take the minimum value in the reading as the measured thickness, which can achieve better results.
11. When measuring cylindrical materials such as pipes, oil drums, etc. with ultrasonic thickness meter, it is very important to select the angle between the probe crosstalk interlayer and the axis of the measured material. Simply put, it is necessary to couple the probe with the measured material, the probe crosstalk barrier is parallel or perpendicular to the axis of the measured material, and then slowly shake the probe perpendicular to the axis of the measured material. The readings on the screen will change regularly, and the smallest value in the readings should be selected as the accurate thickness of the material. The standard for selecting the direction of the intersection angle between the probe crosstalk interlayer and the measured material axis depends on the curvature of the material. For pipes with larger diameters, the probe crosstalk barrier should be selected perpendicular to the pipe axis. For pipes with smaller diameters, two measuring methods, parallel and perpendicular to the axis of the pipe, should be selected, and the minimum value of the reading should be taken as the measured thickness.
12. When measuring materials with composite shapes (such as pipe elbows), a second measurement is required. It is necessary to read the two values of the crosstalk interlayer plate of the ultrasonic thickness tester probe and the axis perpendicular & parallel, and take the smaller number as the thickness of the material at the measurement point.
13. The thickness of the material and the speed of ultrasonic propagation are affected by temperature. If there is a high requirement for measurement accuracy, test blocks of the same material can be used to measure separately under the same temperature conditions, so as to calculate the temperature measurement error of the material and provide parameters for correction. For steel, high temperature will cause larger errors, and this method can be used for compensation and correction.

